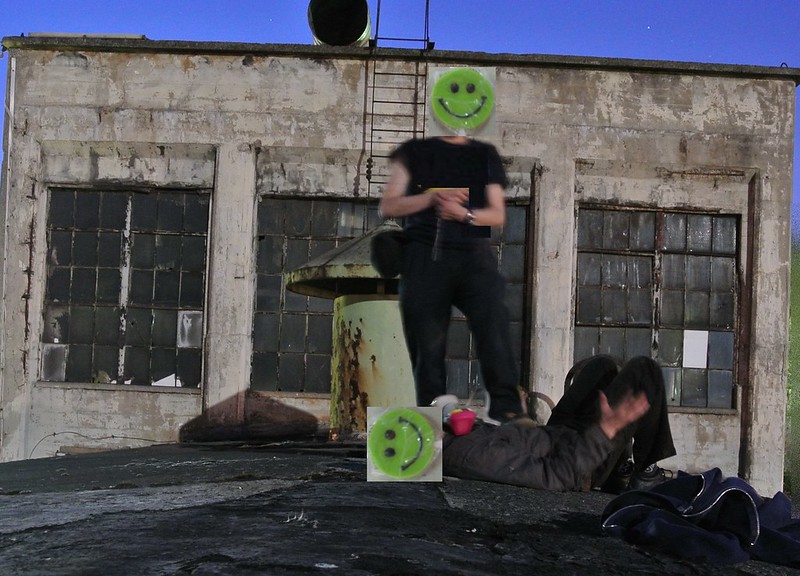
Obfuscation - concealing a face in a photo < on 10/9/2015 8:36 PM >
I like to have people in my photos. I think it makes them more engaging; the viewer might think "I'm there too" for just a second. But I don't want to document that some RL person was where he or she shouldn't be.
So I tell my buddies not to look at me when I'm taking pictures. They aren't portraits. IMHO a rear view of an explorer is even better; the viewer might think "I'm walking behind that guy" for just a second. Still, in all the excitement I might photograph someone's face, and still want to post the shot on the web.
To safely post the shot, I obfuscate the face. I try to do it in a way that doesn't distract from the rest of the picture, like covering the face with a black rectangle. Here's what I do in Adobe Photoshop Elements 2011:
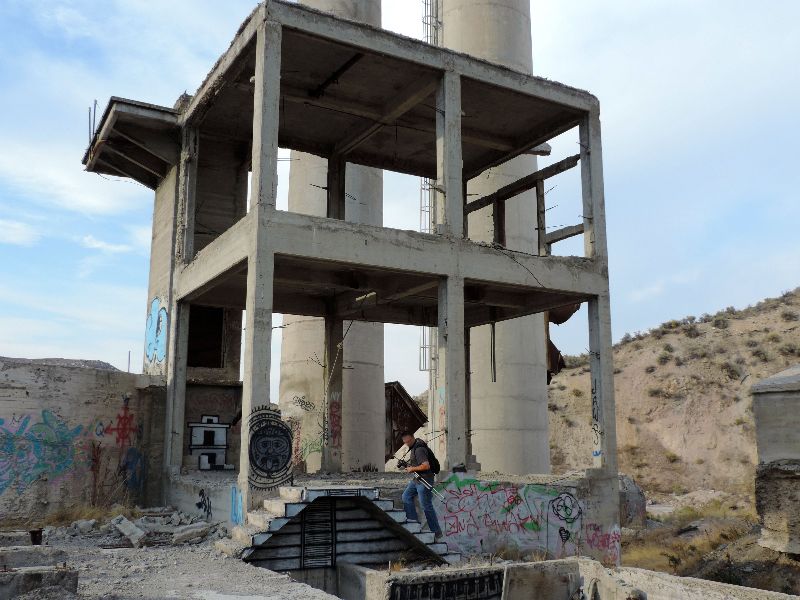
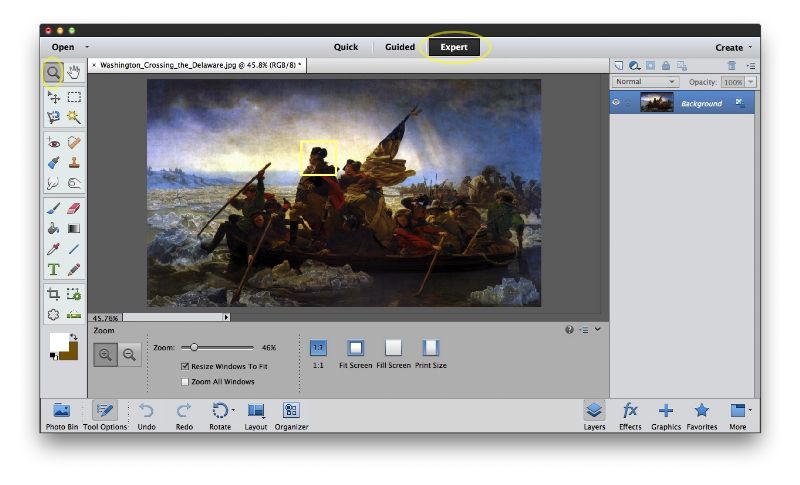
1. Let's say I photograph some explorers approaching a site by boat, and I don't want the British to know who their leader was. Bring the picture into PE. On the top of the window, make sure Expert is clicked; this will enable all the tools in the palette on the left edge. Use the Magnifier to zoom in on the subject's face.
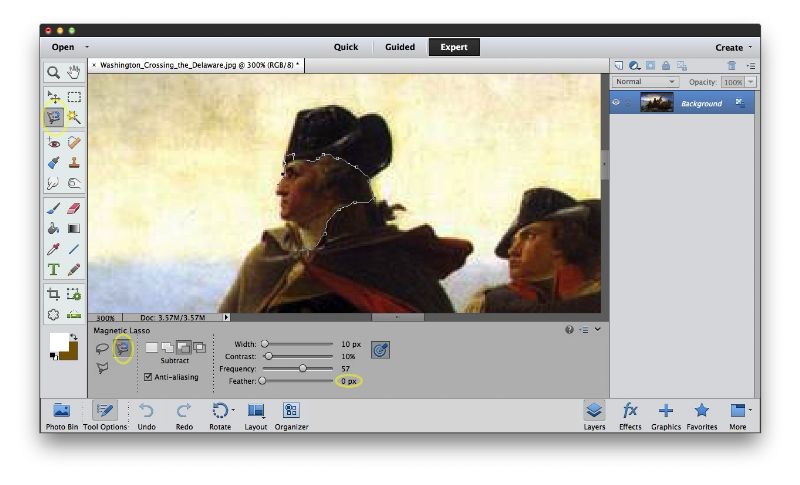
2. With luck, there'll be some color difference between the edges of the face and the surroundings. But even if there isn't, this tool will work. Use the Magnetic Lasso; the cursor looks sort of like a coat-hanger. Make sure Feathering is set to zero, because we want to keep a sharp border around the face.
Click on any border starting point and stretch the "rubber band" of dots slowly around the face. If there's enough contrast, it will automatically put dots down that follow the line of contrast. If there isn't enough contrast, help it by clicking where you want dots. If the dotted line wanders off where you don't want it to, use the Delete key on your keyboard to remove dots back to where the line is good. Try to leave some space around distinctive features on the border like ears or glasses.
When you meet the start of the line, it should turn into an animated border. If it doesn't, force it with the Enter key.
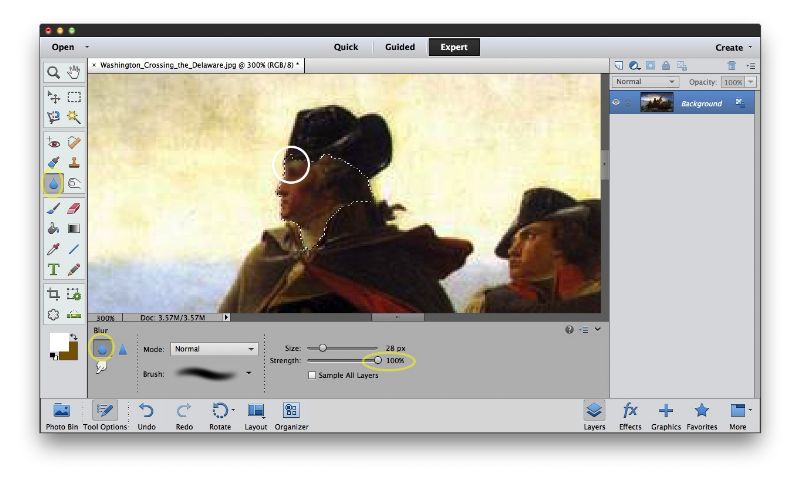
3. Get the Blur tool. Make sure its strength is set to 100%, we're not trying to be subtle. The cursor size doesn't matter, because the selection you've made protects the rest of the photo. Move the circle-shaped cursor over the face, hold down the mouse's main button, and rub it around. If the resolution isn't high, this may be all you have to do to obfuscate the face.
4. For more obfuscation of sideburns, hairline, etc., use the Smudge tool. It's in the same group as the Blur tool, so switch to Smudge in the multitool selector in the bottom left corner. Make the cursor size about 1/8 of the face. Make sure it is not on full strength, because now we're trying to be subtle, retaining some humanoid characteristics (eyebrows, a hint of nose) to minimize the distraction from the rest of the picture.
Move the circular cursor over the face, hold down the main mouse-button and smudge it. I usually work form the center outward, working on things like hairline that seem too individualistic. If things go south, hit Undo to peel it back to where it was good, and try again.
5. Use Magnifier to zoom out to see the whole picture again. Is the dude or lady sufficiently obfuscated, and the photo not too spoiled? Then you're good to post.
post by tx3000 | | Re: Obfuscation - concealing a face in a photo <Reply # 2 on 3/15/2020 1:40 PM >
If you're going to have other image over the face here are 2 easier ways
1. Open the picture in paint via edit 2. Using the select tool outline the part you want to remove 3. Use cut/delete 4. Leave it like that or use fill option in the removed section
1. Open 2 pictures in paint 2. Using the selection tool select the area on the first picture and copy/cut 3. Click anywhere on picture 2 and use paste (Control +V) 4. Drag and move the pasted section over the place you want.
I suggest totally deleting the face before putting another picture over it because someone can just use an imaging program to remove the pasted on image.
post by DudeManDeuce | | Re: Obfuscation - concealing a face in a photo <Reply # 3 on 7/11/2021 2:09 AM >
If you're using Windows or Linux, GIMP is an excellent photo editing program, and it's free. To blur faces, just highlight your face(s), select filters from the top menu, then select blur, then select pixelize. Quick and easy.